One of the first projects I did with the kids was the "Armor of God series." Normally, I try not to do any projects with religious influence, but I do work at a Christian daycare so I gave it a go. I had a great time collaborating with a fellow teacher as we taught the kids about the armor of God.
First we asked the students to wrap the circles with aluminum foil, and it was such a joy seeing them eagerly wrap their circles with as much foil as they could. We helped them tape the foil after that we had them to lay the construction paper onto the shields as crosses. This group of kiddos was surprisingly focused when we started gluing the crosses onto the shields.
After the glue dried, we glued the fake jewels onto the shields. For the sake of time, we limited everyone to 5 jewels. Thankfully, there were no complaints and they had great fun playing with the jewels.
For the handles on the shield, we decided to use ribbon so that no one would break or tear their handles while playing. It was a bit of a struggle trying find the best adhesives for the handles at first but we settled on velcro circles for one end and we glued the other end. Each handle was tailored to their individual hand so they would be easy to use.
We started off by cutting semi-ovals into cardboard. The cardboard we used was thinner than the circles we used for the shields just so it would be easier to cut. We gave the shoes the same treatment as the shields; taping on foil and gluing plastic jewels onto the cardboard.
** Just as a side note, my coworker and I cut each pair of shoes to tailor to each students' feet **
To make our shoes wearable, we punched two holes near the straight edge of the shoes and tied the rainbow string into the holes so they would fit around the ankles.
Here's a close up of the finished product:

The supplies for the breastplate and the belt were:
- cardstock
- staples
- construction paper scraps
- heart-shaped doilies
- paper clips
- fake jewels
- glue
We decided to work on the breastplate and the belt on the same day just because they were similar and there wasn't a long wait for glue to dry.
My coworker pre-cut two large rectangular pieces of cardstock and some thick cardstock strips. We then stapled two strips to connect to the rectangular pieces. Each strip acted as a strap for the shoulder. Then she glued the heart shaped doilies to the front of the breastplate. After that we let the kids tear and glue down pieces of construction paper until they filled as much of the white space as they could.
Some students were not too keen on the idea of filling all the white space and I tried to respect that because even at a young age, we all have our preferences. It's always been important to me to give others room as artists to follow their intuition, so whether they were inclined to leave little or plenty of white space I respected their decisions.
For the belts, we stapled two long strips of cardstock together and then stapled about 4 or 5 smaller strips to hang from the belt. As the breastplates were drying, the littles began gluing their jewels onto the hanging strips of the belt.
We used paper clips to wrap the belts around the waist that way it would be easy to remove. If you'd like you could also use velcro instead of paper clips.
I loved the way they turned out:


For the helmet we used:
- plastic colanders
- construction paper
- glue
The helmets were pretty straight forward. The kids glued pieces of construction paper onto the colander which helped keep consistency through the armor.
The supplies for the sword were:
- sword template
- cardboard
- markers
- gesso (optional)
- paint (optional)
The swords were by far my favorite piece of the armor to make. I used a simple sword template to cut out cardboard swords. This part is optional, but I used gesso to prime the swords for coloring and so that the color would stand out more. The kids colored the swords using markers. If you would like to use paint to color the swords my advice would be to make sure they don't use too much paint otherwise it'll warp the cardboard.

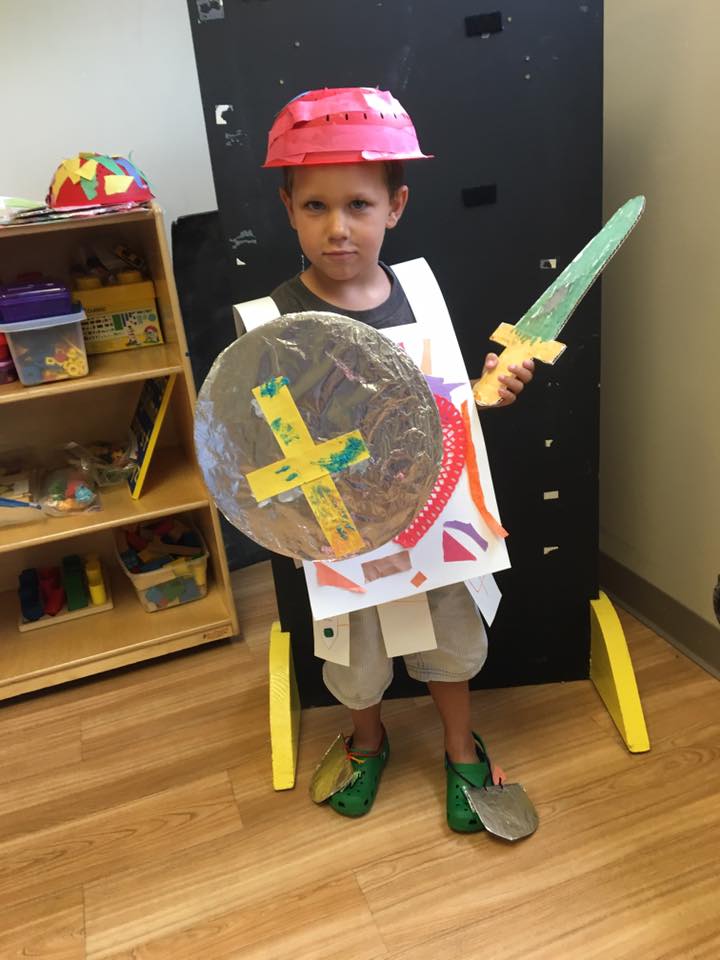
With the parents consent, here are some pictures of some little warriors with their full armor on:


I thought this was such a fun project even if you work at a public school. Instead of presenting it as the "armor of God" you could read a story with knights or other warriors. It's great fun for imaginative play.